Building a custom mechanical keyboard without soldering: The XD75
Summary
This guide shows why you might want to build a custom mechanical keyboard based on the XD75 printed circuit board (PCB) and how to do it. The main features of the XD75 include:
- Grid alignment of keys instead of staggered columns (more comfortable typing)
- Programmable (customizable, multi-layered keyboard layouts with extra functionality)
- 75 keys in a small form factor (more keys in comfortable reach of each hand)
- “Hotswap” sockets allow installing key switches without soldering and removing them without desoldering (quick and easy assembly and disassembly)

Main features of the XD75
Grid alignment of keys
Standard keyboards use a staggered key layout in which key columns run diagonally from top left to bottom right (e.g. 1–Q-A-Z on QWERTY). When touch typing on such a layout, two main issues arise:
- The fingers of the left hand have to reach under each other to type certain letters in the bottom row. For example, the left ring finger must reach under the left middle finger to type x.
- While the right hand benefits from the diagonal direction of columns, the left hand is handicapped. The right wrist requires less bending to align the fingers with the columns, the left wrist requires more bending.
Once noticed, I could no longer not notice.
In contrast, ortholinear keyboards align keys in a symmetrical grid. All fingers operate vertical columns and fingers do not have to reach under each other (except for the thumbs, which are predestined to do just that).
For these reasons, I find ortholinear keyboards more comfortable to type on.
Programmable
The XD75 can be programmed using the QMK Firmware.
QMK allows giving each key multiple functions. The basic idea is to define multiple layers of different keyboard layouts that can be switched to by pressing certain keys. For example, I can switch between a QWERTZ layer, a QWERTY layer, a layer for games and multiple function layers.
These function layers contain a lot of different… functions:
- Numpad
- Function keys (F1–F24)
- Media controls
- Mouse controls (moving the mouse pointer, pressing mouse buttons, scrolling)
- Standard and Unicode symbols:
“”‘’×÷… - Non-breaking characters (e.g. non-breaking space)
- Unicode input mode switches (to type Unicode characters on different operating systems)
My keymap is part of the QMK repository. The file that defines the different layers contains visual representations that should give you an idea of the possibilities.
75 keys in a small form factor
Having 75 (programmable) keys allows mapping every character or function I use to a key and layer that makes sense to me and which is comfortable to reach.
Example
The standard QWERTZ layout places brackets (used a lot in programming) in a way that makes little sense to me and that makes them uncomfortable to type, particularly those using AltGr. Try to find a pattern:
()Shift + fingers 2 and 3 (split across hands)[]AltGr + fingers 2 and 3 (right hand only, requiring beginner finger yoga){}AltGr + fingers 2 and 4 (right hand only, requiring expert finger yoga)<>< and Shift + < (one without modifier key, both using the weakest finger I have)
Compare this to my XD75 layout, which uses the same, strong fingers of my right hand throughout and uses my left hand for the modifier keys to reduce stretching. All brackets are located in the same two columns from top to bottom:
()Shift + fingers 2 and 3[]Function1 + fingers 2 and 3{}Function1 + fingers 2 and 3<>Function1 + fingers 2 and 3
On a standard keyboard, the large space bar limits the utility of one’s thumbs. On the XD75, I can easily reach four keys with each thumb. I find these additional keys particularly useful as thumbs can comfortably hold keys down while other fingers – even of the same hand – press keys. Therefore, if a thumb key is used to switch to another layer, it not only gives one additional mapping but dozens.
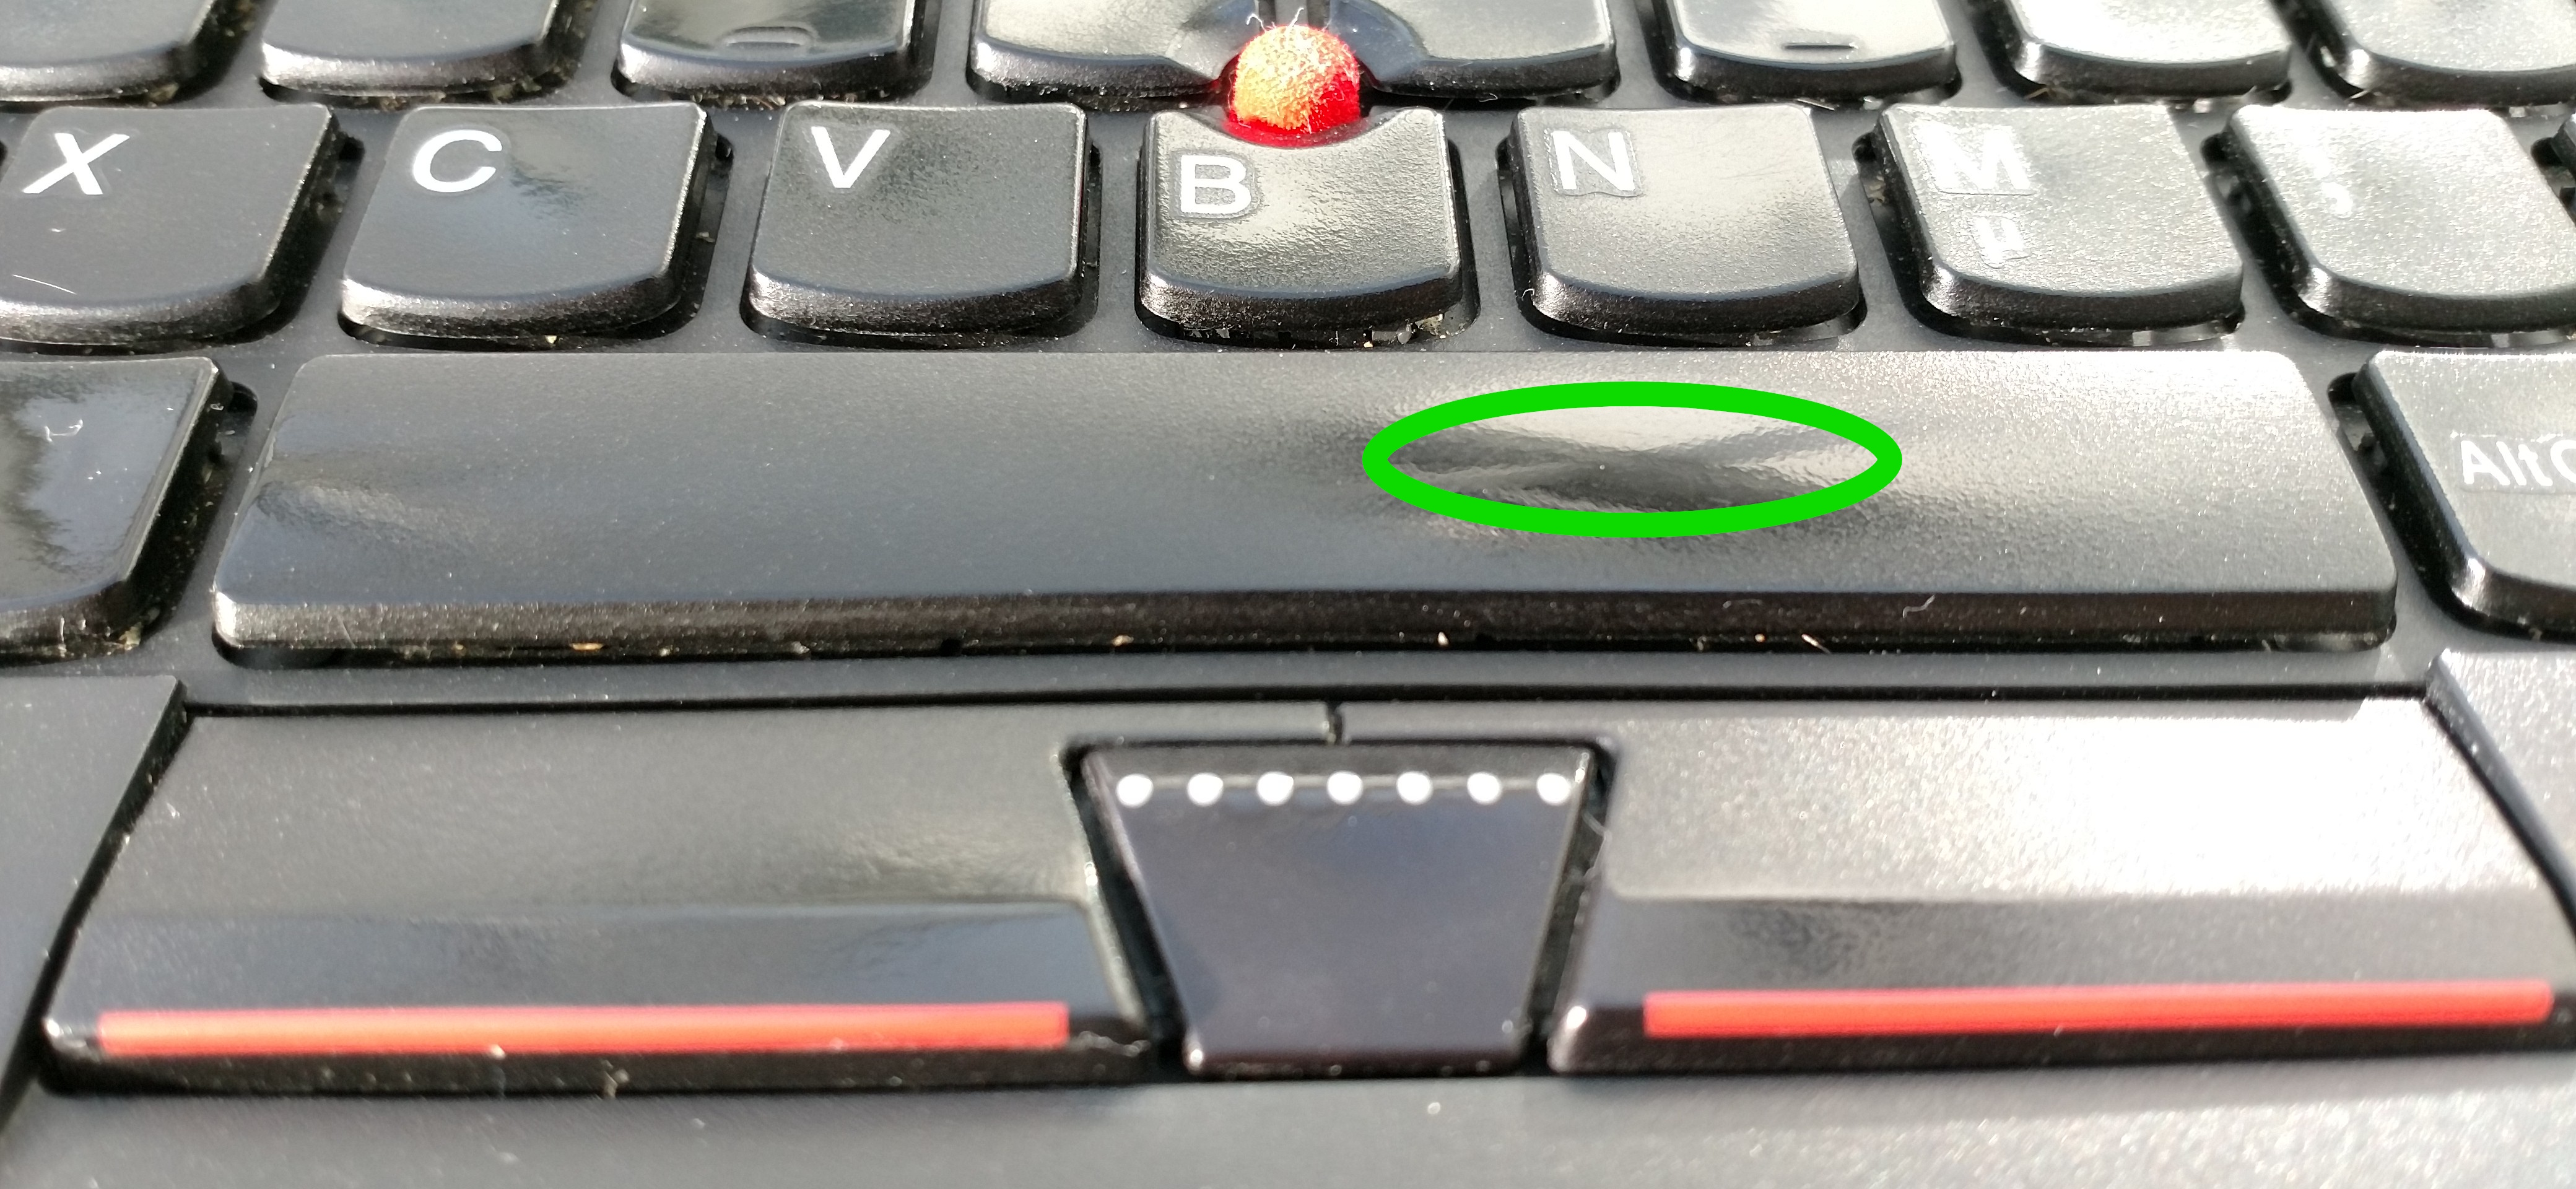
Looking at the wear of my previous keyboard, it is obvious that I mostly press on a small area of the space bar anyway. Consequently, adjusting to a smaller space bar (or rather a space key) turned out to be a non-issue.
In addition, the small form factor of the XD75 saves desk space. Its width is 29.5cm (11.6 inches) while a standard, full-size keyboard is 45cm (17.7 inches). As a result, a separate pointing device like a mouse or trackball can be placed closer to the resting position of one’s hands. (If you use said pointing device with your left hand, this point is moot as the numpad and the section with the arrow keys of a full-size keyboard will not be located between the resting position of your hands and your pointing device.)
Hotswap sockets
Most custom keyboards require soldering the key switches onto the PCB. To remove the key switches, they must be desoldered. This requires soldering equipment and time.
The XD75Re variant of the XD75 PCB uses hotswap sockets. These allow to simply plug the key switches into the PCB and pull them out if needed.
An easy and fast, first assembly is not the only advantage of hotswap sockets. You also benefit if you happen to dislike your initial choice of switches, in which case you can more easily replace them or swap their springs.
Being new to mechanical keyboards, I found it difficult to determine in advance what switches I preferred. To get to the current build of my XD75 without hotswapping, I would have had to solder three times and desolder two times.
Getting an XD75
The three steps to an XD75 keyboard:
- Selecting and buying parts (PCB, case, key switches, keycaps, USB cable)
- Assembling the keyboard
- Programming the keyboard
Not being targeted at keyboard experts, this guide will not explore all available options, of which there are simply too many. LED lighting is not discussed because that would require soldering.
Step 1: Selecting and buying parts
All links to parts go to AliExpress. While shipping from China can take a while to most places, I have never had issues with getting a refund in the rare case I received a broken item or one deviating from its description. KPrepublic, the manufacturer and seller of the XD75, seems to have a good reputation in the community and has an AliExpress Store.
When buying from AliExpress, you might be able to use sales (like 11.11), coupons or cashback to save money. Depending on your country’s import taxes and the shipping costs of your chosen parts, splitting your order into several parcels may also lower costs.
Alternatively, you might find used parts in forums like /r/mechmarket.
Printed circuit board (PCB)
The PCB in your keyboard is similar to the motherboard in your computer (which is itself a PCB). The signal of each key press will propagate this way:
finger → keycap → key switch → PCB → USB → computer
There is only one PCB option with hotswap sockets that does not require soldering:
The XD75Am PCB does not support hotswapping.
Case
While many cases for 60% keyboards will fit the XD75, some cases will not fit well or require modifications due to the uncommon layout of the XD75 (e.g. different screw locations).
Luckily, three cases were specifically made for the XD75. They provide a metal grid for mounting the PCB on one side and the switches on the other.
The cases with an acrylic diffuser allow the LEDs on the back of the PCB to shine through the bottom creating an underglow effect.
All three cases are sold by KPrepublic.
- Stainless steel bent case (acrylic diffuser)
- Stainless steel bent case
- Anodized Aluminium case (acrylic diffuser), select color
I have got the stainless steel bent case, which I find looks great. It is heavy, sturdy and loud.
While some might enjoy the keyboard’s “symphony” at ear-shattering volume, I do not. To dampen it, I put a cloth inside the case and a piece of felt beneath.
Even with o-rings (see below) it is still louder than my previous keyboard but only to a degree that does not bother me.
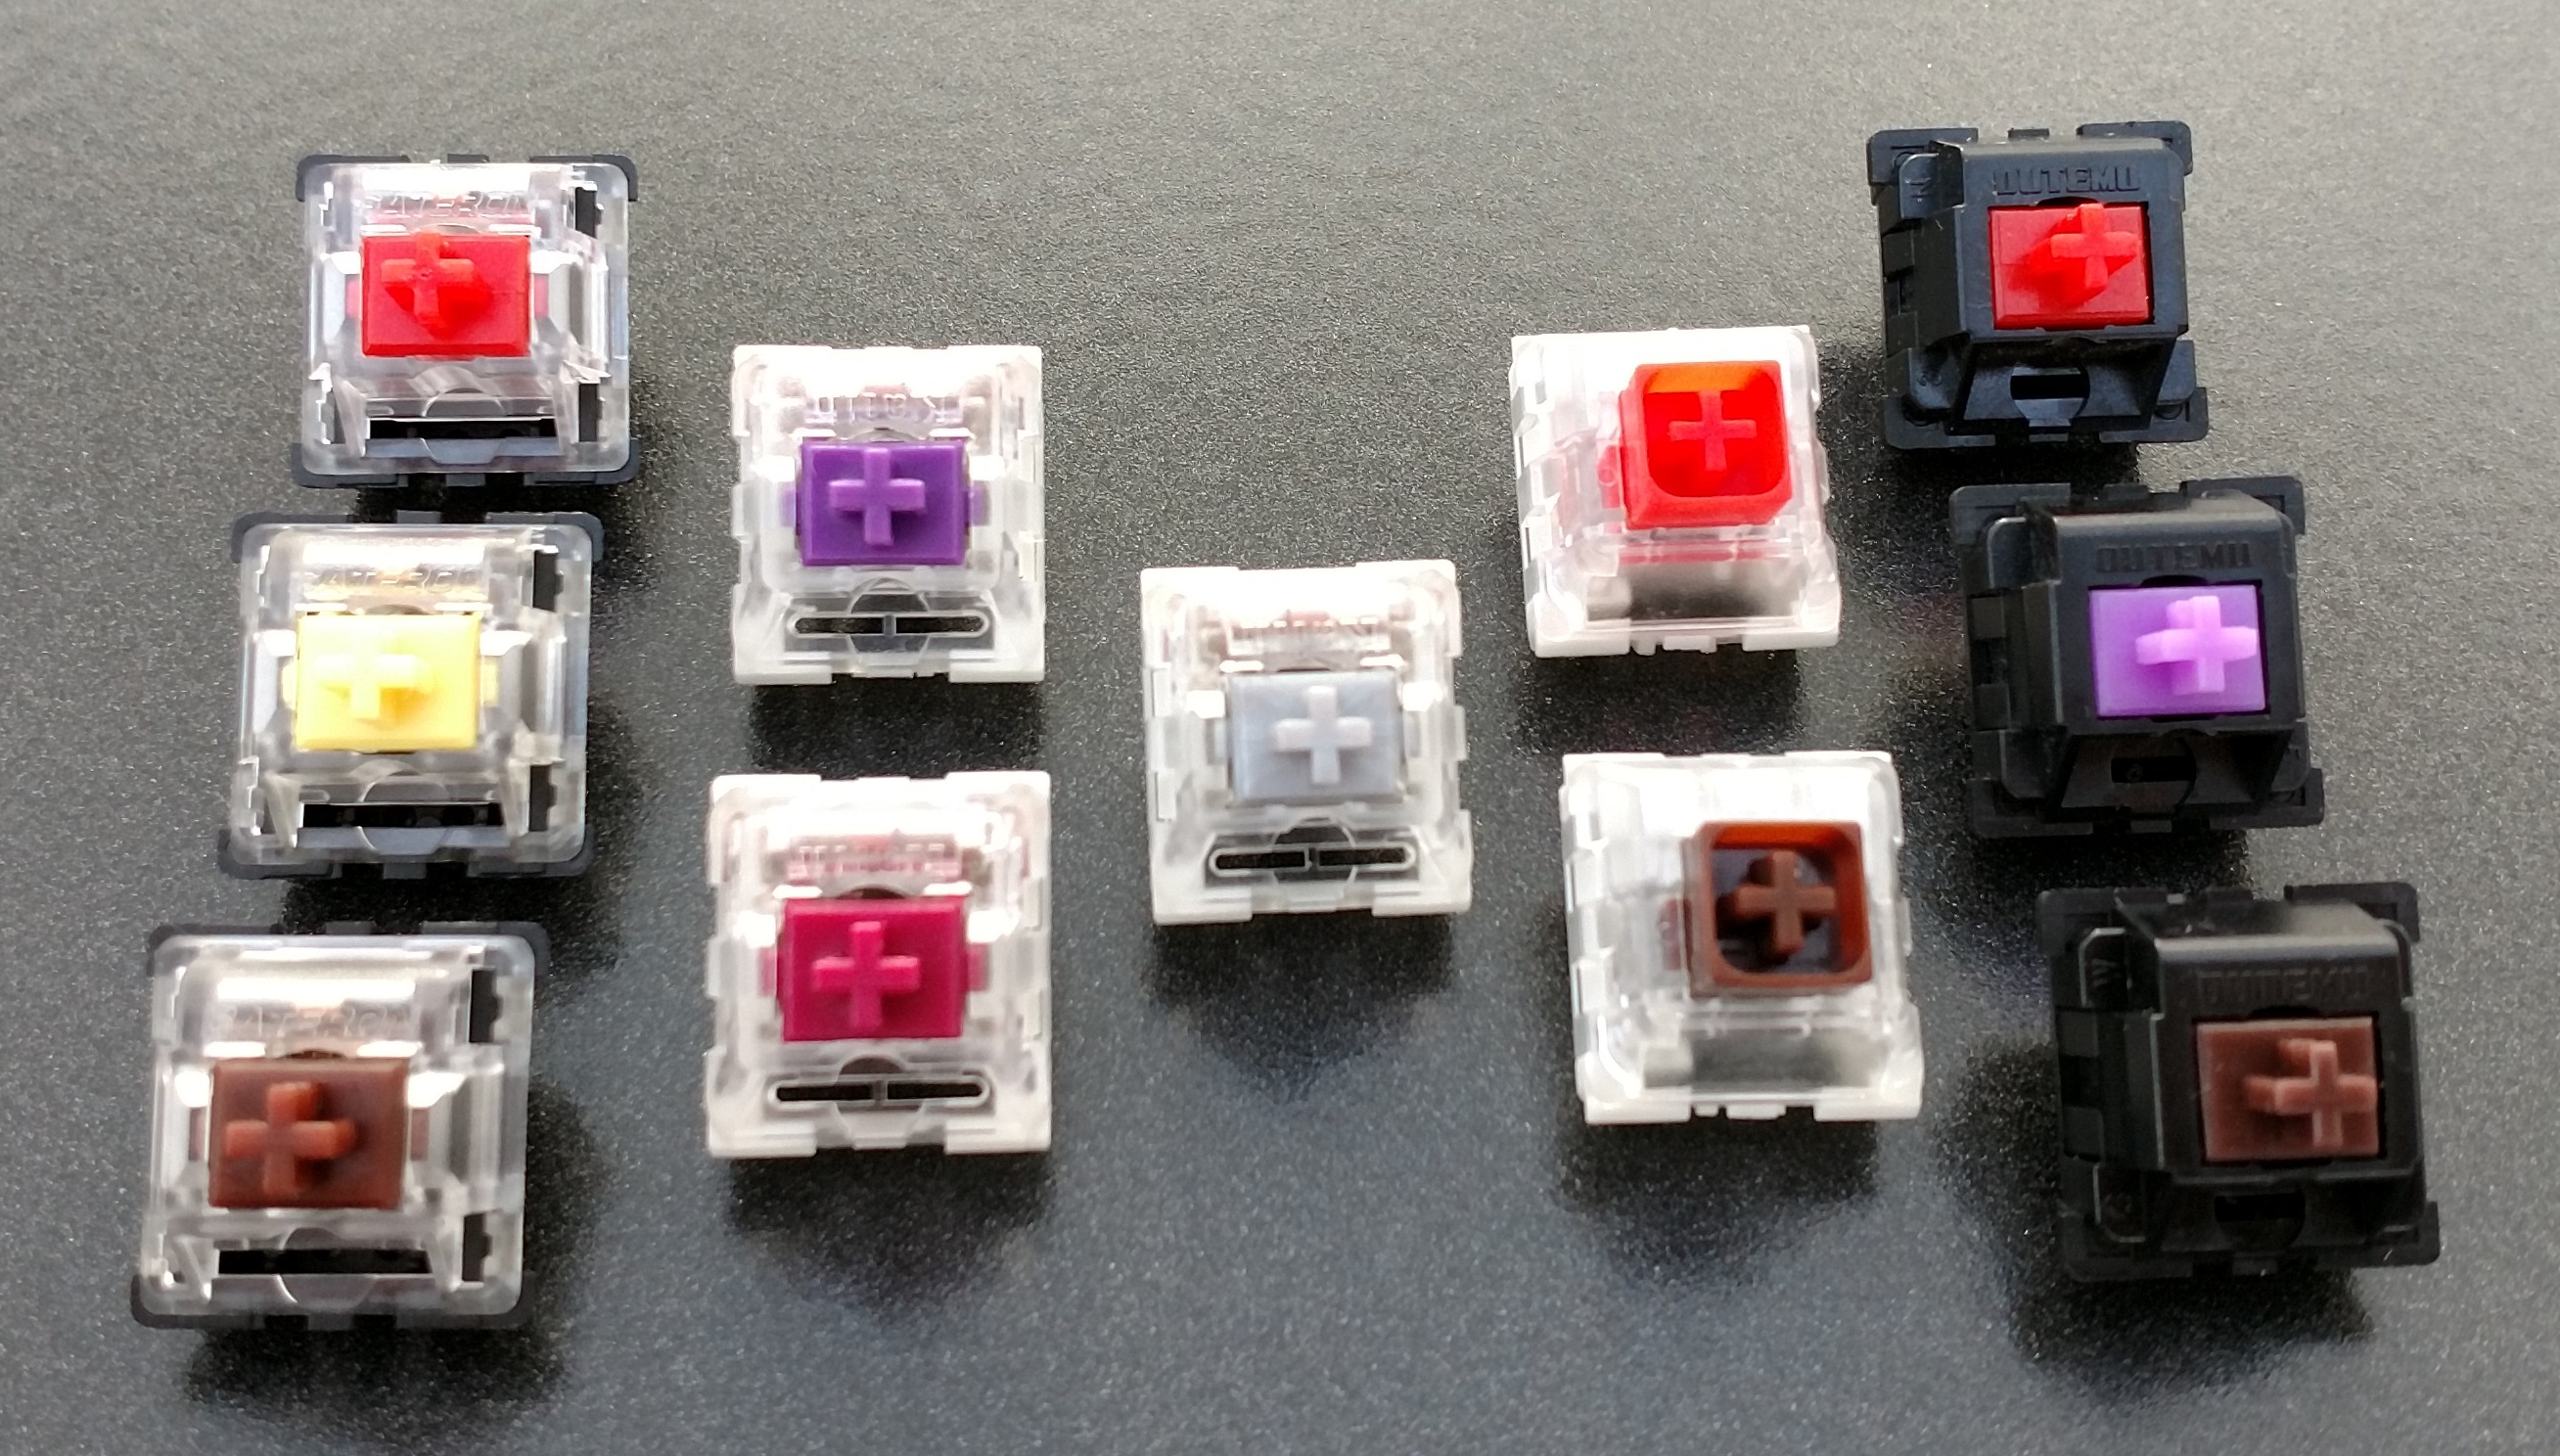
Key switches
Key switches are key to how typing feels on a keyboard. There are many different options, however, only switches with an MX stem will fit the XD75Re PCB. Going through all of them is certainly beyond the scope of this guide and possibly beyond the scope of your life (see Cherry MX switches and its clones).
Switches can differ in various aspects:
- Overall force curve (see this explanation)
- Initial force to depress a key
- Actuation force, also called actuation weight
- Force to reach the bottom of the key (“to bottom out”)
- Key travel (often 4mm)
- Type of switch
- Linear switches require a linearly increasing amount of force to depress a key.
- Tactile switches require a little more force at the point at which the switch actuates the keystroke. It is usually described as a little bump while pressing a key down.
- Clicky switches combine the bump of tactile switches with a “click” sound when actuated.
- Point of actuation (at which point on the way down the signal is registered, often at 2mm)
- Point of release (at which point on the way back up the key becomes ready for the next press)
- Sound dampening (so-called “silent” switches, which are quieter)
Force curves of switches provide an objective although incomplete way to compare switches. Have a look at The Comparative Guide to Mechanical Switches to learn more.
When buying switches, note that depending on the source the stated actuation and bottom out forces may vary. They may also not match the independently measured force curves.
A word on my favorite switches. As I like the short travel and high actuation point of scissor switches, I combined Kailh Speed Copper switches with o-rings.
These switches have 3.5mm key travel and actuate at just 1.1mm. I am using two o-rings on top of each other. One is 2.5mm thick, the other 1.5mm. Note that this adds up to 4mm of o-rings when the total travel is only 3.5mm. This is possible because o-rings go into the keycaps and do not limit the travel of switches directly.
With this setup, the Kailh Speed Copper still actuate at 1.1mm but bottom out at around 2mm. I find the short travel more comfortable, prefer the dampened sound and can type faster than with 4mm travel.
How can you determine which switches you will like? I can think of four options:
- Visit a store that sells mechanical keyboards. This should at least give you an idea about the general difference between linear, tactile and clicky switches.
- Buy a switch tester. Why would you not want to test 81 switches? Well, one reason is that pressing a single switch is different from typing on a keyboard with that kind of switch.
- Buy the switches that you believe you will like. Looking at the different force curves and listening to typing videos might help. If you look at reviews or even just descriptions of a switch, you will quickly find out how much people can disagree.
- Buy a full set of each kind. (In case you are wondering, substituting the above switch tester only requires 6075 switches. Just sell the bad ones on /r/mechmarket.)
Some considerations to make up your mind:
- Larger forces may tire your fingers faster.
- Lower forces may lead to accidental key presses. It will also slow down your fingers less, potentially causing you to bottom out keys more easily and harder. Note that some switches try to alleviate this by requiring a larger force to bottom out.
- Linear switches provide no feedback at which point a key press is registered. At the same time, they can provide a smooth press due to the lack of bumps.
- Clicky switches are louder (all other things being equal). Although the loudest sound usually comes from bottoming out a key, the click is audible and might bother yourself, others or your poor pets. You may want to check out some videos that showcase the sounds of different switches.
- Non-clicky switches are not silent. When bottoming out, you will still hear the sound of the keycap hitting the plate.
You will, and this may surprise you, need 75 switches for the XD75. Consider buying a few more. The odd switch may be defective, not as smooth as others or die before its time.
While preferences differ wildly, I have the impression that the following switch families are more often liked than hated:
These are all sold by KPrepublic.
Keycaps
Keycaps come in many different shapes and materials. They may be blank or have characters printed onto them. Printing keycaps can be done using different techniques, all of which have advantages and disadvantages. Just like with switches, looking at all available options is outside the scope of this guide.
Note that your keycaps must be compatible with the MX stems of your switches.
Being able to touch type, I am okay with blank caps. Yet I would prefer labeled caps, which are more expensive. Typing with one hand is difficult as is pressing certain shortcuts without having both hands in position.
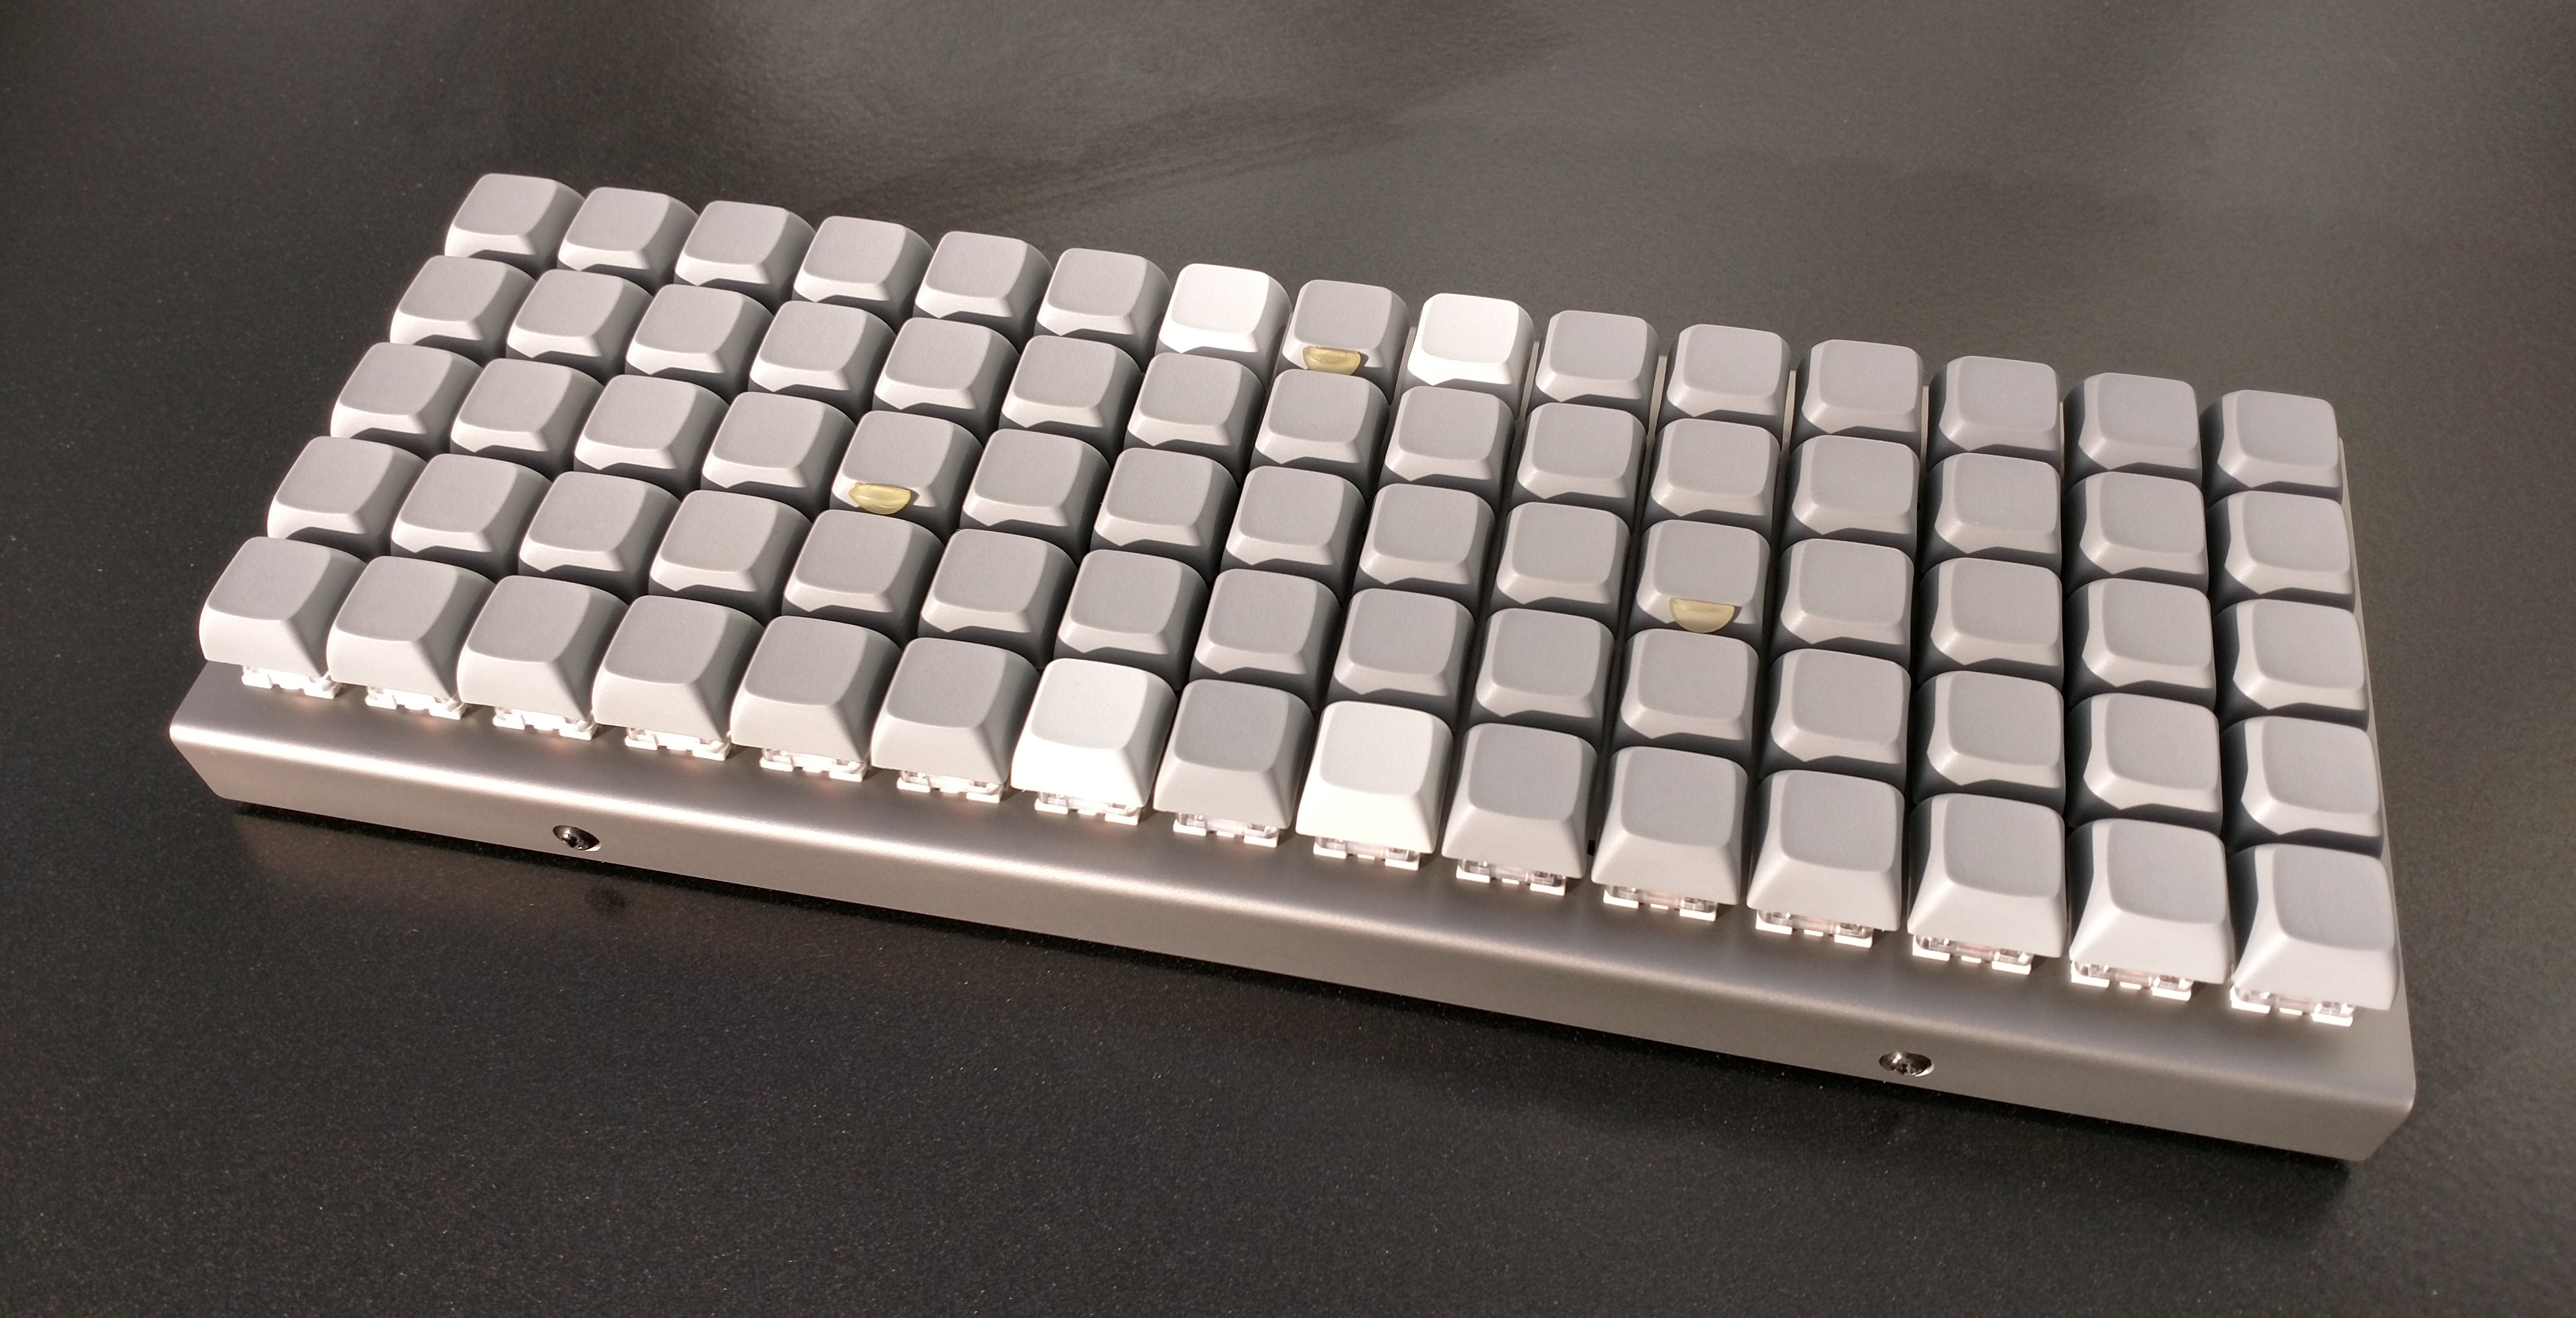
By now you should know that you need 75 keycaps and that you should consider buying a few extra:
XDA keycaps have a significantly larger top area than DSA keycaps. I can more easily type accurately on DSA as XDA feels too wobbly and consequently less precise.
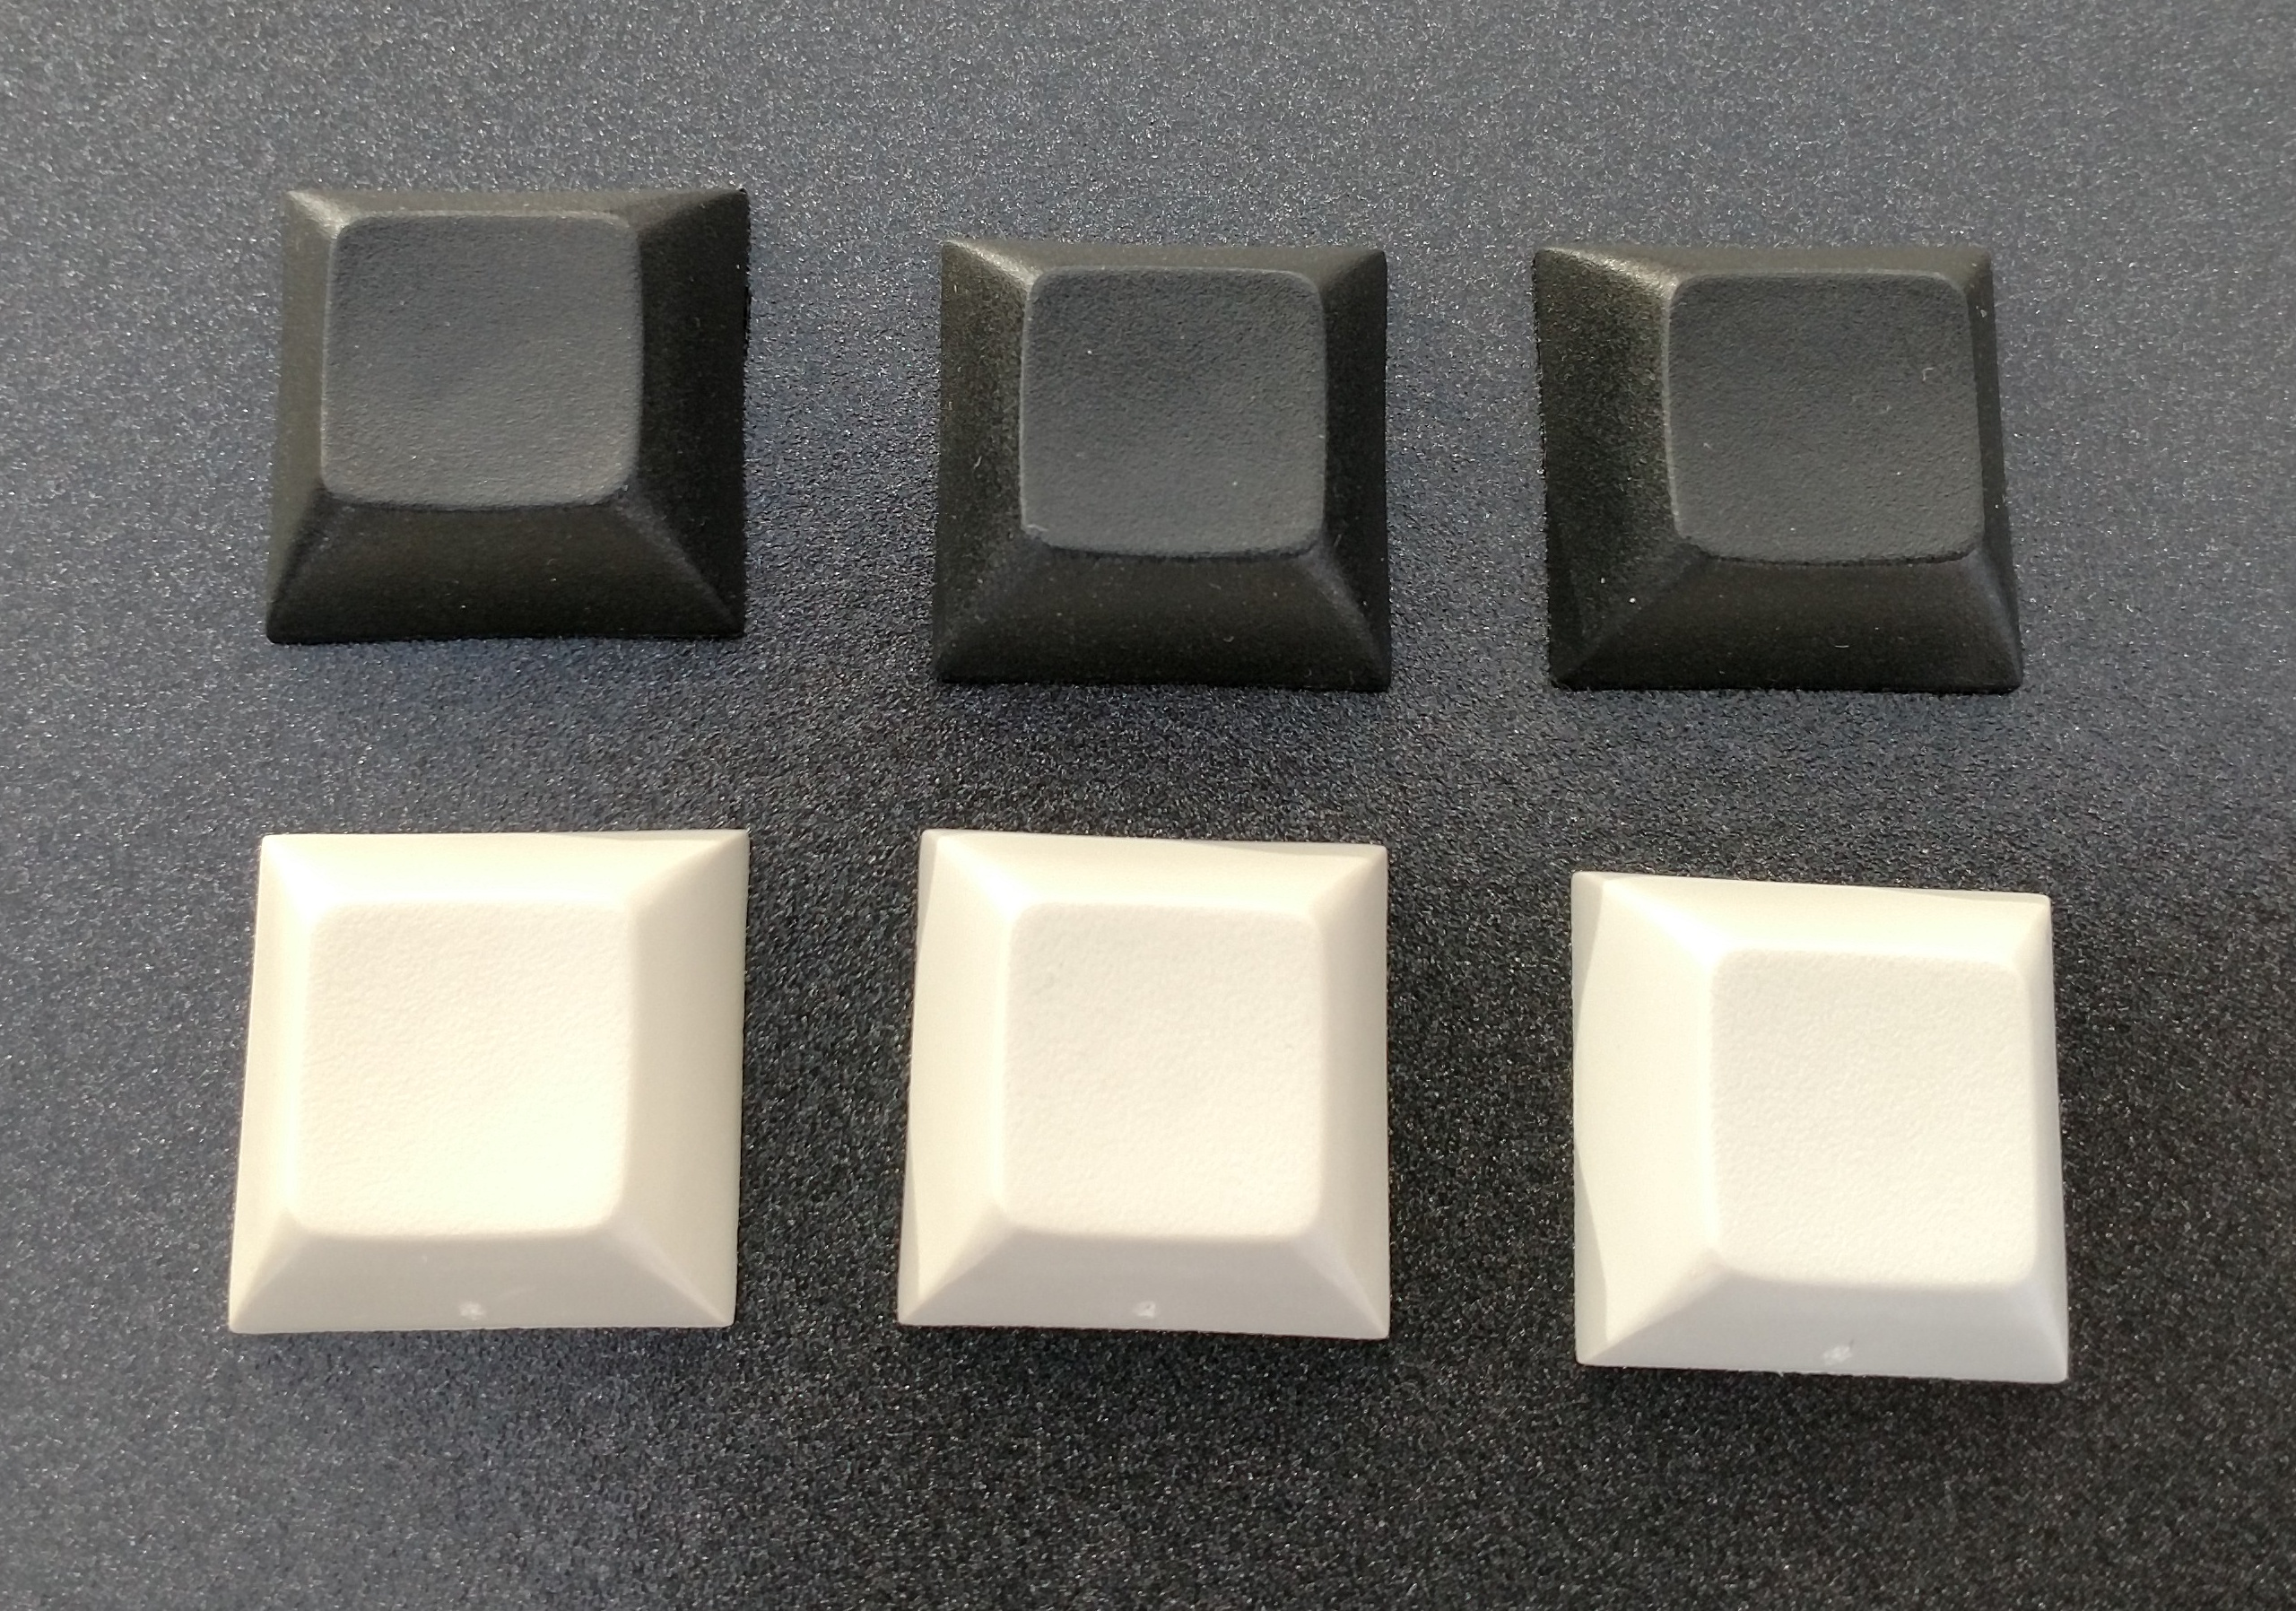
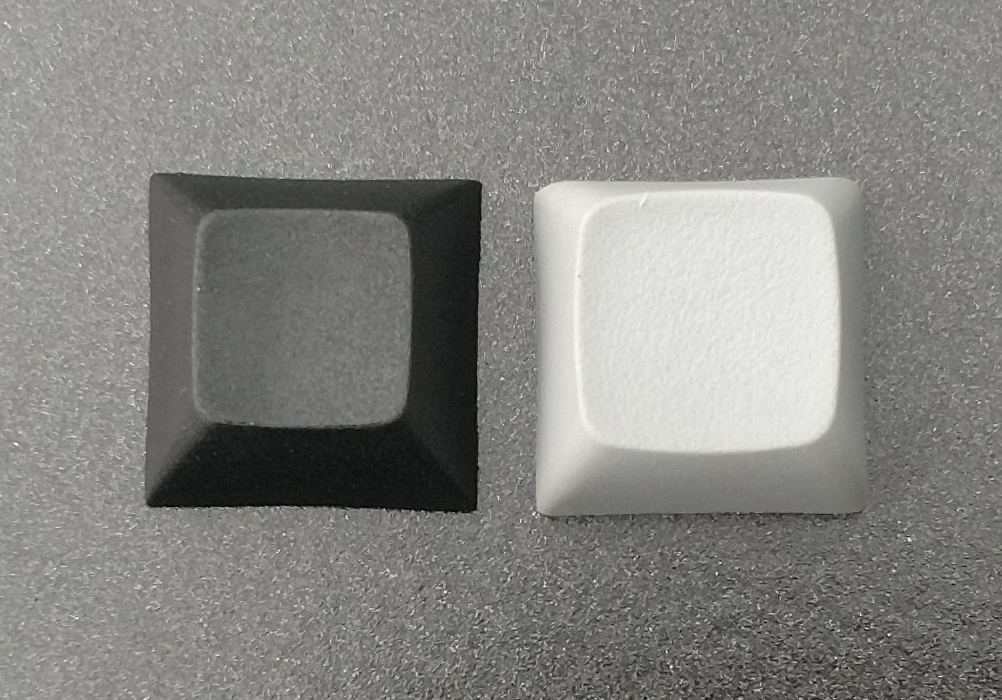
If you look closely at the picture with DSA keycaps, you might see silicone door buffer pads cut in half at the side of certain keys.
So-called homing keys have a feature like a tactile bar or dot on them to allow the typist to locate them by touch without looking at the keyboard. Look at the f and j keys of almost any (physical) keyboard and you will find them.
The DSA keycaps do not have homing keys. The XDA keycaps come with scooped keys that are more concave than normal keys, however, I cannot easily identify these XDA homing keys by touch.
Only after adding my self-made silicone homing keys, I no longer get lost in the near endless grid of 5×15 keys of the same size.
Ingenious people have successfully added various other custom homing features to keys that lack them by using stickers, sand paper, nail polish, tape, etc. or ball bearings. Some buy separate homing keys.
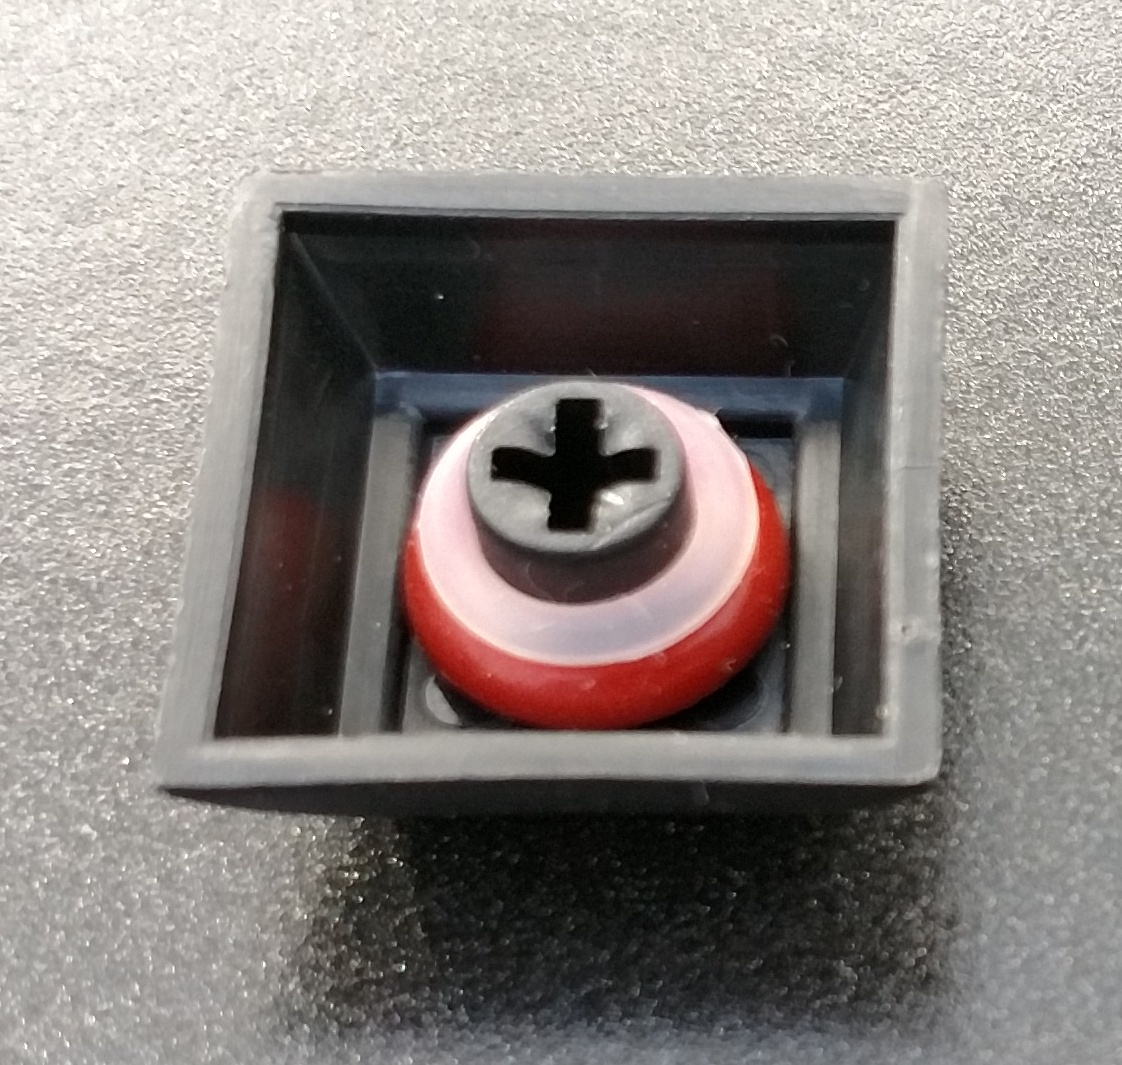
O-rings (optional)
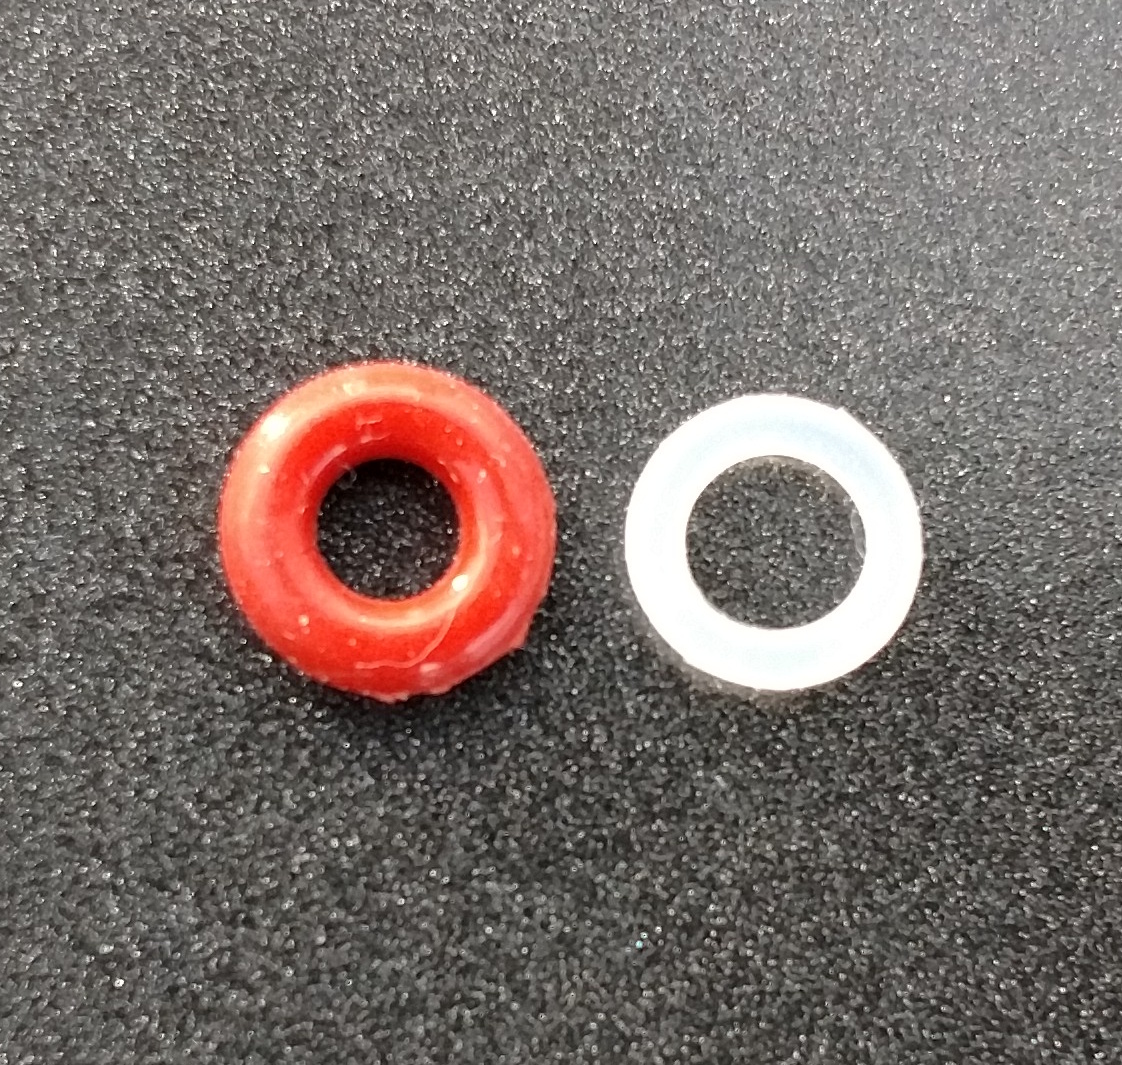
O-rings cushion key presses and dampen their sound. Due to the shape of the above keycaps, thin o-rings can be too thin to have any effect. For both DSA and XDA keycaps I found 2.5mm to be the minimum and 2.5mm + 1.5mm to be the maximum that still allows switches to reliably actuate.
O-rings also differ in their hardness, but many sellers do not provide this information.
Softer and thicker o-rings cushion and dampen more. Thicker o-rings reduce key travel more, meaning that there is less remaining travel after the point of actuation.
When using multiple o-rings, their order matters. For example, I found placing the thinner o-ring on the thicker one feels and sounds nicer.
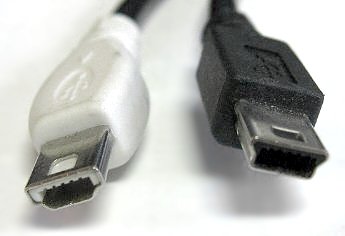
USB cable
Depending on your PCB choice, you need a USB cable with either a Mini-B (on the right) or a type-C connector. You can order such cables here:
Step 2: Assembling the keyboard
This is the point at which you might want to watch an assembly video.
Here is my preferred method. First, the switches are mounted onto the PCB with the metal top plate in between:
- Mount the four corner switches onto the metal plate so that their metal pins are closest to you and the USB port opening faces away from you. They make some noise when their plastic hooks clip onto the plate.
- Make sure that the metal pins of all four switches are straight.
- Carefully mount the PCB onto the switches. Make sure not to bend the metal pins.
- One switch after another, squeeze the PCB–plate–switch “sandwich” together to narrow the gap between the PCB and plate. The first time, I needed to apply substantial force. That said, it does not need to be airtight…
- Connect the keyboard to check if the keys are working.
- Add the top and bottom switches in the middle column and, once more, squeeze the sandwich together.
- Add the remaining switches. Due to the rigidity of the PCB, I no longer need to squeeze the sandwiches at this point.
- Mount the bottom part of the case.
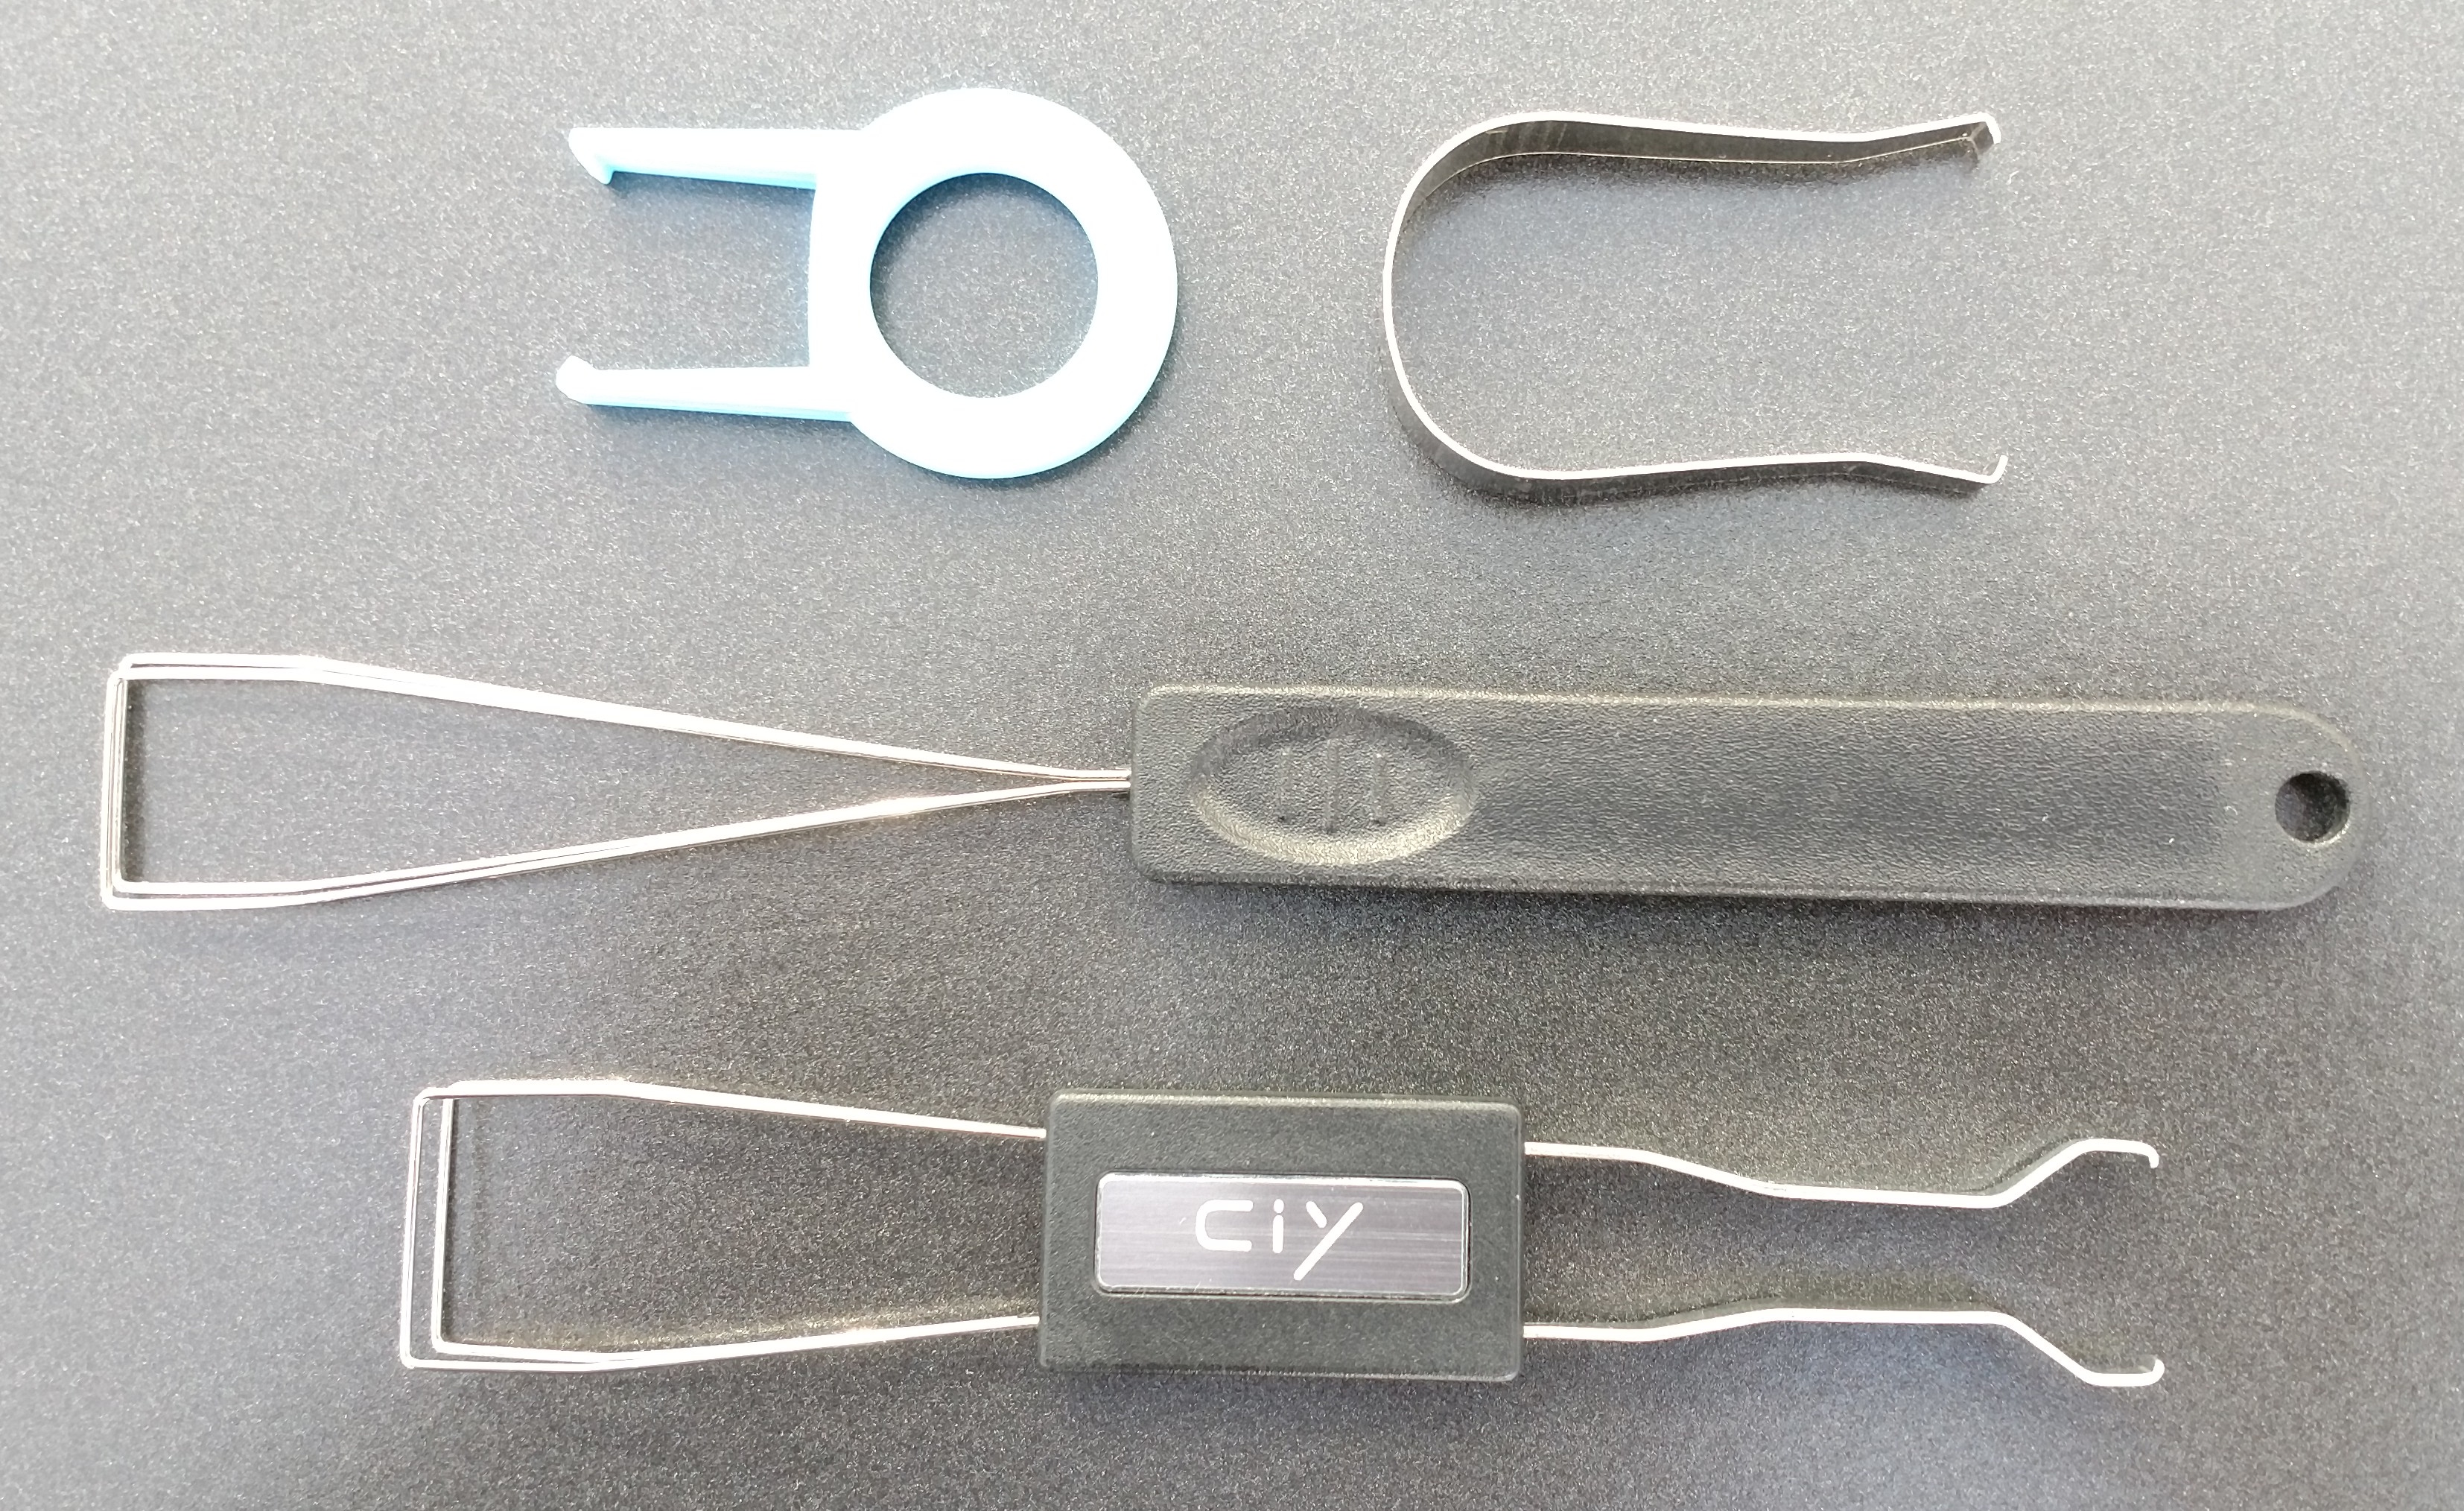
In case you need to remove a switch, you hopefully received a switch removal tool with your order. Simply place it on top of the switch, press the clips on both sides of the switch in and pull the switch out.
Next, mount the keycaps:
- If you want to use o-rings, put them over the stems of your keycaps.
- Mount the keycaps onto the switches. If you feel like you need too much force, turn the keycap 90° and try again.
Step 3: Programming the keyboard
The QMK documentation explains how to install the required software, how to flash the firmware onto the PCB, how to create your keymaps and how to use the various features.
If you know how to program, getting started using QMK should be straightforward. If that is not the case, you might want to watch some QMK tutorials. Maybe watch them now so you know what you are getting yourself into…
Post-purchase disillusions
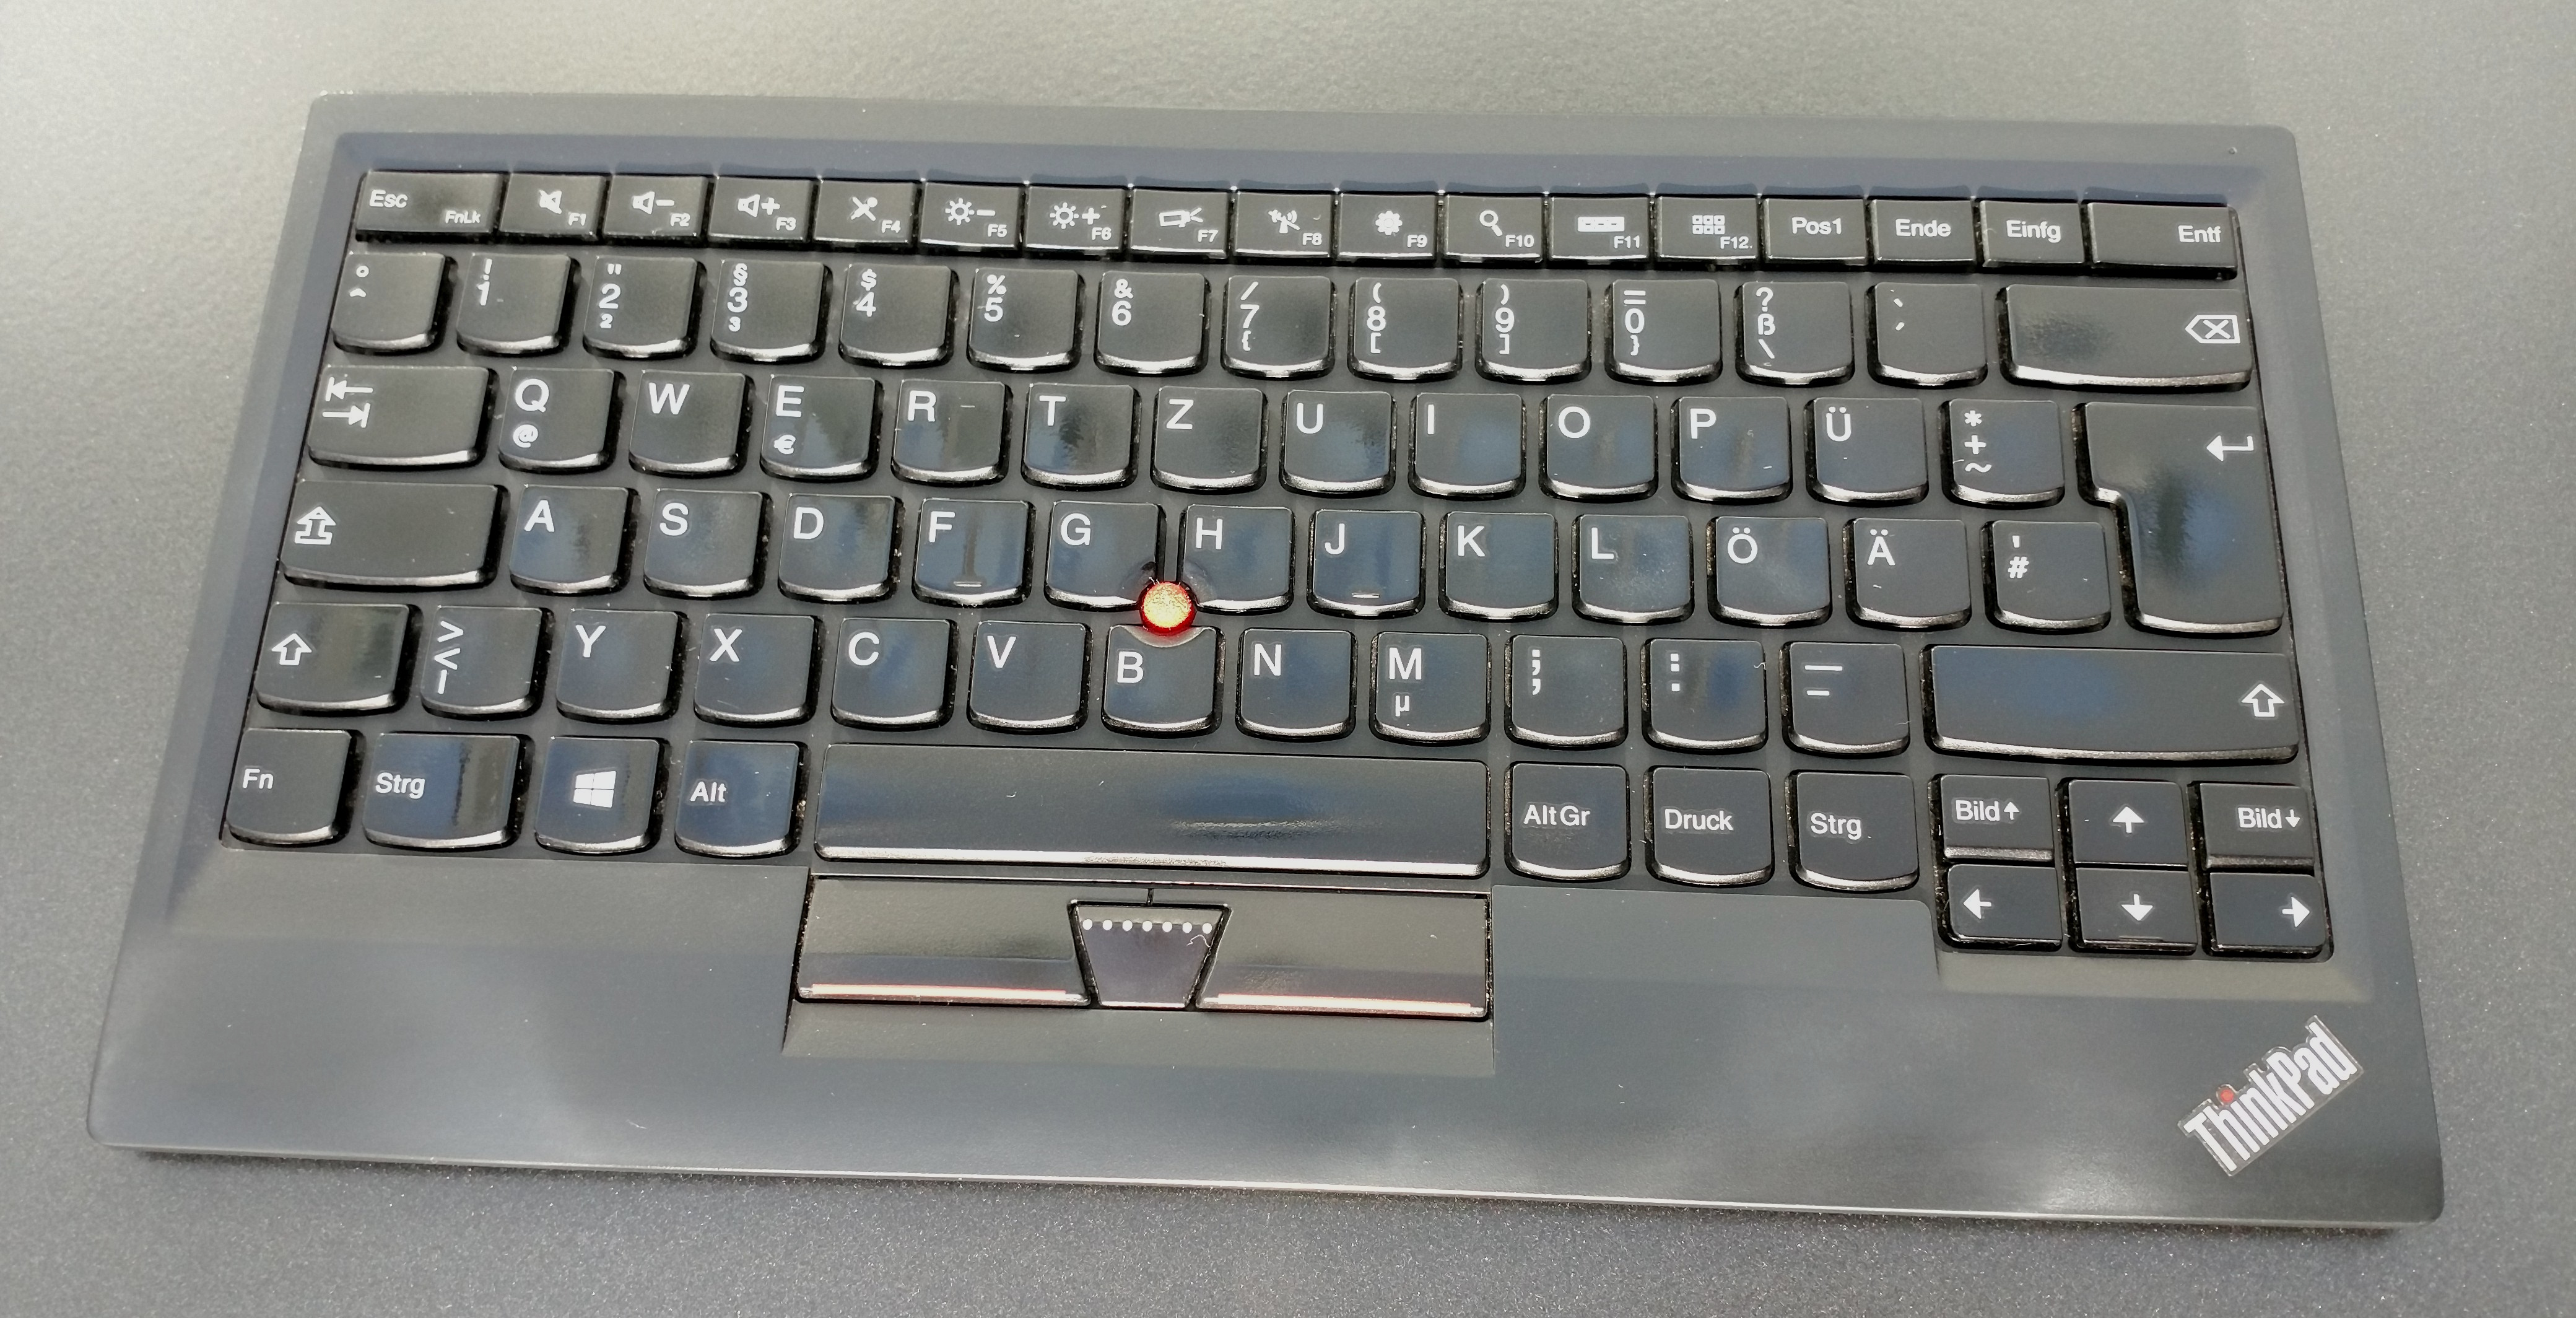
After using a ThinkPad Compact USB Keyboard with TrackPoint for years, the XD75 differed in many ways:
- staggered key columns → ortholinear key layout
- standard keyboard layout → an initially badly optimized custom layout with different modifier positions
- scissor switches → mechanical switches (twice the key travel without o-rings)
- tactile switches → linear switches
- 65g activation force → 27g activation force
- keycaps with large top area → keycaps with smaller top area
Initially, my typing speed in typing exercises dropped from about 100wpm to less than 10wpm. I was barely able to type a single word correctly. Typing outside of typing exercises was even worse because concentration must be split between typing and the task at hand.
After about two weeks of short but frequent typing exercises, I was back at my previous speed. The need to concentrate on the typing diminished significantly within a month. However, I was still making more typing errors and activating keys accidentally because of the low activation force of the Gateron Clear switches I had chosen.
Knowing that the Hotswap sockets allowed for easy removal and installation of switches, I ordered heavier springs to modify the Gateron Clear switches. This resolved accidental key presses and slightly reduced typing errors.

Still not sufficiently satisfied, I bought Kailh Speed Copper switches, which resolved all issues. After a few weeks, I could type slightly faster than before on my old keyboard and with few errors.
After almost a year of using Kailh Speed Copper switches, curiosity made me install the Gateron Clear switches once more. To my surprise, I can now type on them faster, with fewer errors and with virtually no accidental key presses. Apparently, motor skills can improve over time.
I think I would have benefited from limiting the number of changes between my old and new keyboards. For example, buying medium-force, tactile switches that are more similar to the scissor switches I was used to (i.e. Kailh Speed Copper) might have eased the rough transition.
Disadvantages
Compared to the XD75, there are boards that are larger, smaller, more ergonomic, more standard, cheaper, etc. To me, the XD75 is a great compromise across these areas. Depending on what you value, your opinion might differ.
In addition, you might want to consider these possible disadvantages:
- Almost nobody – hopefully excluding yourself – will be able to type on it properly or at all (exacerbated by choices like blank keycaps and Gateron Clear switches)
- Getting up to speed can be challenging (depends on your brain and on the chosen switches and keycaps)
- Choosing blank keycaps makes touch (or blind) typing a requirement and one-hand usage difficult
- Harder to keep oriented due to lack of tactile features (e.g. a space bar, a larger enter key, space around arrow keys all help to feel where your hands are on the keyboard)
- Lower availability of keycaps than for other keyboards (few keycap sets feature 75 1u keys, buying two sets increases costs)
- Keycap sets might lack homing keys or have some you may find insufficient
- Could be more ergonomic (concave keywells, split halves)